fbpx
Category

Quilt

Category

If you’ve been wanting to design a quilt on the computer? Or play with different fabrics and layouts quickly before you make a decision to piece the blocks together?

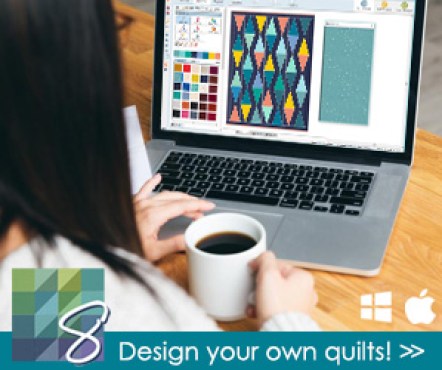
Well, today I’m going to show how you can easily do so with Electric Quilt 8 Software. 

Electric Quilt Software

Electric Quilt software is a powerful tool designed to cater to quilters of all skill levels. From novices to experienced quilters, this software opens up a world of possibilities. With its intuitive interface and user-friendly features, you’ll find yourself immersed in a quilting wonderland where your imagination knows no bounds.
Shop ElectricQuilt.com

Save 25% on EQ8, Upgrades, and Lesson Books at Electric Quilt HERE> with code LEARN. Sale ends at 11:59pm ET on 8/15/23.

The Electric Quilt software Version EQ8 is available for download for Mac and Windows and it’s pretty straight to use. However, there’s also some learning curve if you want to take your design to another level. At the moment I only use the basic tools and I like EQ8 most for figuring out the layout, the yardages required, and cutting directions. 

In this post, I’ll bring you along as I quickly design the simple baby quilt I just made earlier – Churn Dash Quilt

Picking the quilt layout

I begin with picking the layout. I wanted to make a simple 9 blocks and sashing in between. In the quilt layout section, you can easily change the number of blocks, and pick different layouts such as on-point and even custom layouts where you can have various-sized blocks. 

This is also where you can set the size of the sashing. All of this is made easy with sliders on the left-hand side of the screen. 

Picking ready-to-use blocks

With the extensive library of blocks, here is where you can easily start. Just pick the blocks and place them in the current sketchbook and it’s ready to use in the quilt layout.

You can edit these blocks in the block worktable but you can also use it as is. Easy as pie. 

I picked the block called the Monkey Wrench – which I know as Churn Dash Block for this quilt. I then simply click the empty layout and filled it in with the block.

Colouring the quilt

Now comes the fun part and my favourite part of EQ8. Colouring the quilt with the fabric you have at hand! You can simply upload the fabric in the library or use similar colours in the library provided. 

There are various options here, you can buy an add-on library of new fabrics where collections of fabrics are ready to use for you or you can upload it yourself. I usually do the latter one. Simply take a photo of your fabrics and upload it or find your fabrics online and save the photos and upload them in the library. 

Once uploaded, you can use it like a paintbrush. I love this part of the EQ8 and the concept of digital quilts. You can quickly switch around fabrics and see how it looks before you piece them together!

Printing the block-cutting directions

You can print out the block-cutting directions easily with a click of a button and it will come out with such layout below.I like to refer to this and I usually change the values slightly to take into account some trimmings. For example, for the half-square triangles. In the block cutting directions given, it is the exact cut. I like to make mine slightly bigger so I can trim to the exact final size. 

For example, this block, calls for a 4 7/8″ square for the half-square triangle units to make a 4.5″ unit. I simply round that to 5″ instead of cutting the fiddly 4 7/8″.

I also look for any opportunity to cut time and include strip cutting like the 4.5″ x 2.5″ rectangles can be cut into long strips of 2.5″, pieced together and then later cut into 4.5″ square units. These changes are the things I like to include in my quilt pattern if I were to share the quilt pattern. But if it is for me, I usually just make a mental note or note it down on this piece of cutting directions.        

Fabric Requirement

Once you’ve designed a quilt, you can also print out the fabric requirements. There’s an option on fabric from yardage or fat quarters to make it easy if you’re working from a fat quarter bundle. I usually love this for estimating how much background fabric I need. This is also really helpful when you want to make a larger quilt and want to know how much fabric would you need to make a quilt pattern in a bigger size.  

Overall, I am yet to explore more about Electric Quilt and I am still using it for the very basics but I find it really helpful to have. If you want to try it, buy it on sale like it is right now where you can save 25%! I bought mine during the sale too and the fact that it can be digitally downloaded makes it easy for me as well.

Speaking of Sale, there is a limited-time sale right now that you may want to check out. Use code: LEARN and get 25% off right now at Electric Quilt. Sale ends at 11:59pm ET on 8/15/23.

Let me know if you too have used EQ8 and if you want me to share more of the behind the scene. I love that you can quickly design a quilt with EQ8, and get straight to the most fun part – sewing it together!

It’s been a while since I made a baby quilt, and I have forgotten how fun it is. So quick to piece and quilt. And gifting it away is the icing on the cake. Handmade with care, a baby quilt becomes a cherished keepsake that holds not only physical warmth but also the warmth of your affection. 

Picking Fabrics

One of the best things about making a baby quilt is working with fun cute fabrics. I love working with bright colors and this is one of the projects that I get to do so. For this quilt, I am using a set of fat quarters that I received from Annie’s Fat Quarter Kit Club. It was such a delight opening the package to these beautiful bright fabrics and seeing the cute fruits with little faces on them!

Oh, and here’s the coolest part: You can snag your own fat quarter kit from Annie’s with a jaw-dropping 50% off your first shipment! Just follow this link and use the code SHARE50. Trust me, you’re gonna want in on this.

Churn Dash Baby Quilt Pattern fabric

Selecting the Quilt Pattern

I knew I wanted a simple design and wanted to make sure the pieces are large enough to showcase the prints with the cute fruity faces. I have always loved the churn dash block, so I decided to make a 12.5″ churn dash block from the mix of fabrics. I only need to make 9 of the blocks to make it large enough for a baby quilt. I decided to use up leftover background fabric from this previous quilt here as I only needed less than a yard of the background to make all 9 blocks. 

Introducing the Scrap Sorting Cart: my new way to sorting my scraps and putting them all in one place. 

Hey there,

Have you ever found yourself knee-deep in a pile of fabric scraps, desperately searching for that perfect square for your next quilt project? Well, fret no more, because I’ve got something that’s about to revolutionize your quilting game – the Scrap Sorting Cart!

Hey there, fellow Quilty and sewing friends! Hold onto your sewing needles because we’ve got some seriously exciting news to share! I am so delighted to introduce you to the fabulous “Make” fabric collection, brought to life by the uber-talented Kristy of Quiet Play for Riley Blake Designs. Picture this: a vibrant explosion of rainbow colors and a sewing machine that’s doing its happy dance. Yep, that’s what you’ll find in “Make” – the ultimate crafting dreamland for all you color-crazy, fussy-cutting fanatics out there!

I was so excited when Kristy asked whether I would like to join in the fabric tour for the launch of her new fabric collection “MAKE” which is as many of her collection, bursting with vibrant colours. 

Meet the Creative Whiz Behind “Make” fabric collection

Let’s give a warm welcome to Kristy Lea of Quiet Play, the brain behind this jaw-droppingly awesome fabric collection! She’s like a magician of foundation paper-piecing quilting patterns, and with “Make,” you can peek through some of her wonderful pattern like the rainbow sewing machines & scissors.

A Party of Rainbow Colors! ?

Okay, imagine a party where rainbows are the guests of honor – that’s the “Make” fabric collection! It’s like a pot of crafty gold at the end of a rainbow, bursting with vivid colors. With these eye-popping hues, your projects are gonna be Insta-worthy masterpieces! They are so easy to match up with many other of her fabric collections too. I love that there are lots of coordinating pieces in various colours, meaning you can pick one or two of your favourite colours from the rainbow, match it up with one the feature fabric from this collections and you can add your own touch to the project. 

Sew Much Fun with the Rainbow Sewing Machine

Can we just take a moment to gush about how insanely adorable this sewing machine is? ? It’s like the cutest sewing buddy you could ever wish for, with colorful body and a heart motif, it is hard not to love it.  “Make” comes with the cutest, quirkiest, and most magical rainbow sewing machine motif you’ve ever seen! Sewing has never been this joyful, folks! We’re talking about unicorns level of joy here. Trust me; you won’t be able to resist smiling every time you see this sewing machine sprinkling rainbow confetti all over your fabric! ??

Quilt basting is a crucial step in the quilting process, ensuring that the quilt top, batting, and backing stay securely in place during the quilting process. While there are various methods to baste a quilt, one popular technique is floor basting. Floor basting provides ample space and allows for a smooth and even basting process. 

I have tried several different ways to baste including basting on a table, and on the wall but doing it the floor is still the best method for me. 

In this blog post, I’ll walk you through my process of basting on the floor. If you baste on the floor too, drop in some tips! If you’re a beginner quilter and wonder how you can baste a quilt, I hope this post will give you a better idea.

Benefits of Floor Basting: 

  1. Ample Space: Unlike other methods that might require a smaller workspace, floor basting allows for more extensive quilt layouts. You can easily spread out your quilt layers, ensuring proper alignment and avoiding any wrinkles or folds.
  2. Accessibility: Working on the floor eliminates the need for bending over or reaching across large surfaces. This accessibility provides better control and precision during the basting process.
  3. Versatility: Floor basting works well for quilts of all sizes, from small baby quilts to large bed-sized creations. It allows you to work on any project without limitations.

For this basting tutorial, I am going to demonstrate with photos of my basting process for this colourful house quilt which I talked about earlier in this post HERE>

how to baste a quilt with pins. Easy way to baste a quilt

While floor basting offers many benefits, such as ample space and accessibility, it also has a few potential disadvantages:

  1. Physical Strain: Basting on the floor can require prolonged periods of kneeling, sitting, or crawling, which can put strain on your back, knees, and joints. This can be uncomfortable, especially for individuals with mobility issues or physical limitations.
  2. Floor Surface Limitations: The type of floor surface you have may affect the success of floor basting. Uneven or rough surfaces can make it challenging to achieve a smooth and wrinkle-free quilt base. Additionally, if you have carpeted floors, the fabric layers may not lay as flat or secure as they would on a hard surface.
  3. Floor Cleanliness: Ensuring a clean floor surface is crucial for successful floor basting. Dust, pet hair, or debris on the floor can transfer to your quilt layers, potentially causing stains or affecting the overall appearance of your quilt.
  4. Lack of Adjustability: Once you’ve positioned your quilt layers on the floor, making adjustments can be cumbersome. If you need to make changes or fix alignment issues, it may require rearranging the entire quilt layout, which can be time-consuming and frustrating.
  5. Limited Accessibility for Some Quilters: Floor basting may not be suitable for everyone, particularly individuals with physical limitations, such as back or knee problems. It may be challenging for them to maneuver on the floor and perform the necessary tasks involved in basting.

Despite these disadvantages, many quilters still find floor basting to be a viable and efficient method. It’s important to consider your personal circumstances, physical abilities, and the condition of your floor surface before deciding if floor basting is the right choice for you.


Here is a step-by-step on how to baste on the floor. 

Amazon Prime Day is just around the corner, and it’s time to gear up for an incredible array of deals and discounts. To help you navigate through the multitude of options available, I’ve compiled a curated list of must-check-out items during Amazon Prime Day related to quilting and more! You can start adding them to the Wishlist and Come again here on Prime Day and check them out. 

amazon prime day deals sewing and quilting organization


Finally, the giant flimsy is done! This is a free quilt along by Fat Quarter ShopAll the free patterns for the 24 blocks are out together with the layout instruction. There are several layout available, and I have chosen the largest layout – 99.5″ square

You can find all about Sewcialites 2, a free sampler quilt along 2023 HERE>.

There are free video tutorials, so if you are a beginner, be sure to pick up all the tips Kimberly has for you as she sews the blocks in the videos. I love picking up various tips from different quilters as they teach me to become a better quilter.

While there’s no hard and fast rule in quilting, there are definitely some time-saving tips and piecing tricks that just make things easier that we can pick up by watching other quilters sew. 

I learned so much from sewing along the last round for Sewcialites I,

You can see my first Sewcialites quilt (also a free sampler quilt) HERE>

This round I’m sewing mine using a fat quarter bundle by Tasha Noel called the Quilt Fair!

Tasha Noel Quilt Fair

and today, it is officially a finished flimsy. 

You can read a little oopsy I had getting this giant together below…

I am still working along with the QAL using the Summer Memories Book by Susan Ache.  Use Hashtag #summermemoriesqal to join along. The book is an eye-candy filled with great projects and is sure to inspire you to pick up some red and blue fabrics to get started. I knew I did! But what really caught my eye was the basket quilt.

I am a little behind, but that is okay, the point of the quilt along is to enjoy sewing along with others, and it’s always fun to see other people’s blocks popping in my feed on social media. Are you following along?

summer memories quilt along

Summer memories quilt along is brought to you by Fat Quarter Shop and they are having a 20th Birthday Bash SALE, so come and check it out while it last.

Another fun Finish this week is a table runner. I have been intentionally trying to make more small usable projects like table toppers and table runners for me to gift away. I do love small quick projects for quick gratification.

Making small quilted gifts

As much as I want to gift every friend and family member a full bed-size quilt, that seems like a big dream, and most likely some will never get anything made from me. So, I have been intentionally putting more time and thoughts to make these small items that I am making to gift away. As I make these gifts, I am always excited thinking about the person who will be receiving them, and I think that is part of the joy as well. 

Some ideas that come to my mind when gifting quilted gifts are hot pads, table runners, table toppers, pouches or placemats. I have gifted these before and they’re always fun to see again when I come and visit my friends and family at their home. 

So, I’m looking forward to making more and spreading more love to more people. 

Mini Charm Pack

Mini Charm Packs typically contain 2.5-inch by 2.5-inch squares of fabric. These packs consist of an assortment of fabric prints and colors that are carefully curated to coordinate with each other, often following a specific theme or color palette. Moda Fabrics releases new fabric collections regularly, so their Mini Charm Packs provide quilters with the opportunity to explore and work with the latest fabric designs and patterns in a convenient and cost-effective way. I do love that you get all the variety from one single mini charm pack. Some people like to collect these for their favorite collection just to keep.

Mini charms packs are super fun to get, especially when you grab them at the counter in a brick-and-mortar shop or when you’re trying to fill up the cart to get free shipping when shopping online. You can even sign up for a monthly dose of Mini Charm Packs here>. This is a great way to get an idea of what fabric you might want to get in a larger precut size or even in yardage.

Another Quilted Table Topper got finished today. Small projects are fun to make, enough to get all the fun feeling of making it to the finish line, and also a great project to learn new skills. I usually use small quilted projects to top all kinds of furniture in my home. 

At this point, I may have a little more than I needed, so this one is going to be gifted someday! It’ll go in my bucket of gifts to give away. 

This one is a project from March 2021 Sew Sampler Box. I love the fabric. The pattern called for 2 charm packs as received in the Sew Sampler Box and I had to add some yardages for the background and the accent fabric. 

Spinning the Seam Flat

This was such a fun project and I had fun making the little 9 patches. To make sure the seams are not too thick, I press the seam in a spin to ensure that there were less bulk which makes it easier to quilt. 

You can see what I mean by that in the video below:


View this post on Instagram


A post shared by Amira – Quilting And Sewing (@amira_littlemushroomcap)


Free Motion Quilting Echoing Leaves Motif

If you are in Free Motion Quilting Bootcamp, there’s a practice template for this motif in the workbook.

I love how this motif adds textures to the quilt, and it is dense enough for my liking and easy to do under a domestic machine. 

You can read more tips on free motion quilting with a domestic machine and all the essentials I used HERE>

Free Motion Quilting design for domestic machine

The quilting process took about 2 hours but was surely a relaxed one. It was an easy design as it was very organic and flexible. I spread the 2 hours in 3 days, quilting here and there whenever I have a few minutes to spare. It took 3 full bobbins to complete the quilting as it is pretty dense. 

Binding

Stripy fabric to the rescue. I love to stash on stripes, hence I usually go over the SALE section here and stock up for some whenever there’s a good stripe fabric. This time I purposely made the binding a little wider, just to frame the quilt a little more since there are no borders. 

Quilted table topper moda charm pack pattern

I love how you can easily brighten up a table with a quilted table topper. I wouldn’t eat on it, but it is nice to freshen the table when the table is not in use. 

Would you eat on your quilted table topper?

Probably controversial. Some say use your quilt.. but really, I would use them when cuddling in but for eating on, maybe not. But I think having a plastic cover on them is an option. 

Labeling the Quilted Table Topper

I was inspired to try out the method for labeling shared by Emily Dennis HERE. I didn’t do exactly as hers, but I tweaked it so that it is blending with the binding and I’d say it turned out pretty good! I’ll share a tutorial on how I put this as I put the binding soon.

I used one of the labels I custom made and this new template is coming to Quilt Label Wizard as a bonus soon! If you are already in Quilt Label Wizard, you’ll be notified of the new bonus, but if you are not yet in the course, come and join us and never miss labeling your quilt next time. 

Labeling quilt Quilted Table Topper Starry Checkker Corey Yoder Spring Brook-2

quilt label custom make it yourself

I love how subtle it is in the binding.

A finish is always worth celebrating!

One quilt flimsy is done, and several more are waiting. But a finish is worth celebrating!